Sidechained basslines are commonly heard in Synthwave music lately. A steady bassline that ducks when the kick drum hits, giving the bassline a nice groove and sense of movement. Typically this is done with a compressor set up to duck when the kick drum reaches the threshold. Alternatively there are LFO plugins out there that do an even better job, and can allow the pumping to continue even without a kick present. But Phonec has it’s own way of doing this. In fact, Phonec can create an entire ducking bassline that can be played with a single key. It’s secret is in the Arpeggiator/Sequencer combo. Let’s have a look at how this works.
For this tutorial I will be using Ableton Live, but any host will do.
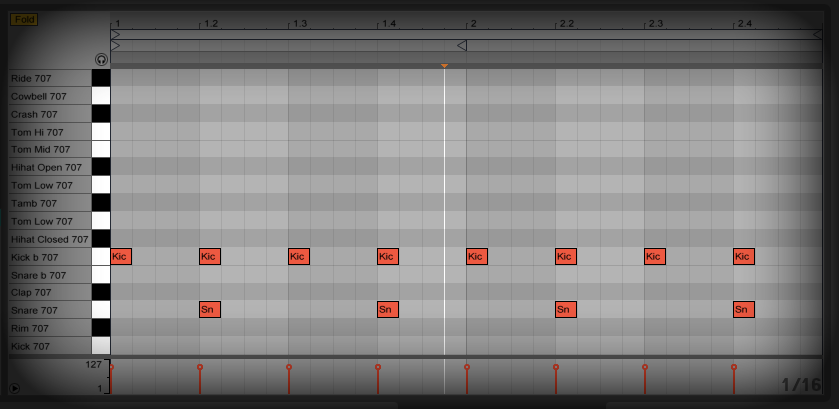
Before we get started, let’s set up a simple drum loop so that we can hear everything in action. I’ll use some 80’s drum samples. The 707 works well for this sound. Now let’s make a 4/4 kick with a snare on every other kick.
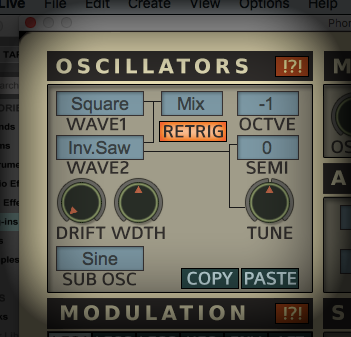
Now let’s open an instance of Phonec and choose a decent synthbass patch that would be suitable for a steady, outrun-style bassline sequence (Presets 20-26 are perfect for this). If you’re making one from scratch, using a Square waveform against an inverted Saw works great. I also like to make sure the ‘Retrigger’ switch is activated so the waveforms start at the same phase on each note. Also, you might want to set the Octave to -1.
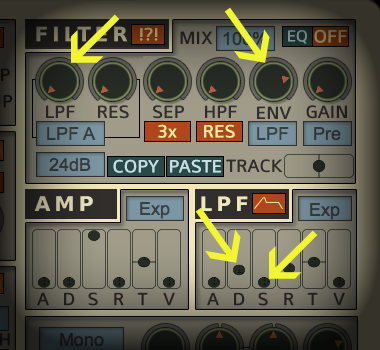
Turn the Filter’s Cutoff all the way down, and set the ‘Env’ control to around 80. Set the Filter’s Envelope Decay to around 0.75, and make sure the Sustain is all the way down to 0. This will give us a nice bass sound that will work nicely for our bassline sequence. For an even tighter sound, try setting the Contour of the Filter Envelope to Exponential (Exp).
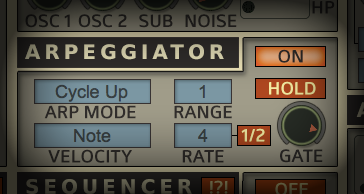
Now let’s activate the Arpeggiator, and set it’s Rate to 4 with a Range of 1.
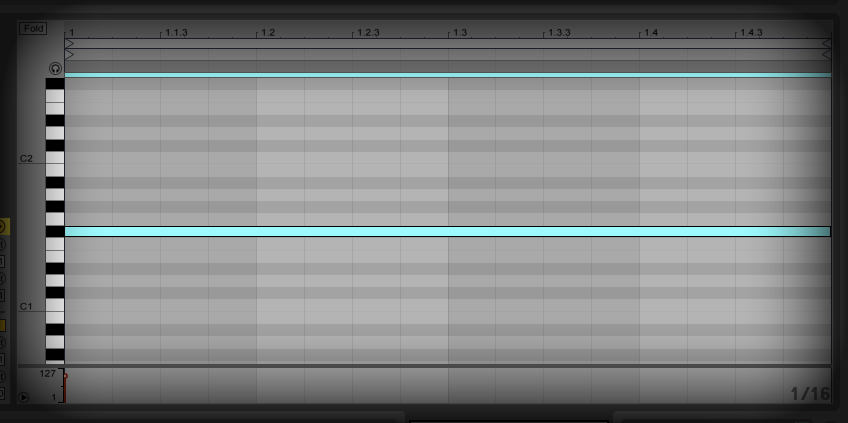
To make sure everything plays in sync, let’s create a 1-bar clip with a single note loop.
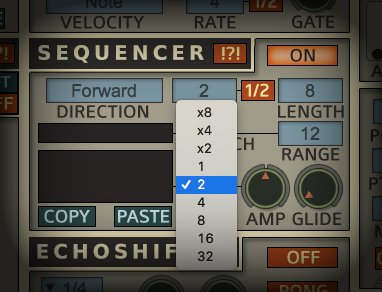
This creates a fast bassline in sync with the kick drum, but it’s pretty stagnant without any movement going on. To fix this, let’s activate the Sequencer, located right below the Arp. We’re going to be using the Sequencer as more of a modulator for the Amplitude, so leave the Pitch grid empty for now. To make the sequence match the kick drum, we need to set the Sequencer’s rate to 2.
On the bottom grid, we’re going to raise the levels of all the odd-numbered steps (steps 1, 3, 5, & 7). This is in line with each kick drum. Raising levels typically would increase things, but what we’re going to do now is decrease the main Amplitude Sequencer Level. This causes a reverse effect. So now raising levels is actually decreasing them. As we bring the Amp Level control down, we will start to hear the bassline ducking in sync with the kick drum. Use this subtly, or it will sound unnatural. I like the way it sounds with Amp set around -40.
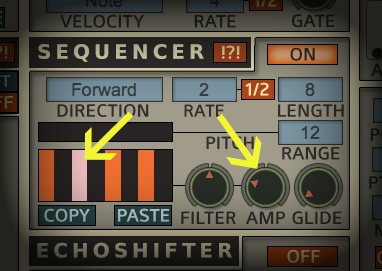
Adjusting the Glide control just a bit can smooth out the transition between steps. This can act as an Attack control. Set this around 13.
Another trick that’s not as common, but sounds really cool, is to reduce the Filter Sequence Level as well. Try this at -20 to give your bassline added movement with Filter ducking.
Now that we’ve established a good pumping bassline, try experimenting with the Pitch sequencer. Add an extra note on one of the ducking steps to give the bassline more interest without being too obvious.

There you have it. Now you can save this as a preset to use conveniently in any track. I call this a one-finger bassline, but since this is arpeggiator based, try holding a few notes and see what happens. Happy experimenting!